Meeting Management 2018
General information
Types of users and rights
- Administrators:
Administrators are ETSI staff. This group includes the TB/ISG support staff (Technical Officer, Support Co-ordinator) and the Meeting support staff.
- Super-users:
They are the TB/ISG Officials (TB/ISG Chairman, Vice Chair, Secretary) and the Meeting contact(s).
- Member users:
They are Full Member, Associate, Applicants, Councellor or ETSI. If you do not know whether you company is an ETSI member, you may contact the concerned TB/ISG staff team or Membership Care team (LINK OR EMAIL ADDRESS).
- External Users:
External users do not represent a Full Member, Associate Member, Applicant Member, Counsellor or ETSI. They may have an EOL account (i.e ISG or Observers) or not (i.e TB Guest).
- Meeting contacts:
The meeting contact is the person defined at the meeting creation (for example: Contact person in the Host company, Support Co-ordinator or Secretary of the concerned TB).
This person must have an EOL account. The person shall receive notifications when actions are performed on presence recording (see Participants presence and status).
The meeting contact can be changed anytime before, during and after the meeting.
Note: There can be more than one meeting contact per meeting.
EOL account
An EOL account is the ETSI OnLine login and password credentials that allow access to the ETSI portal features and document repository.
The EOL account is composed of the person name and initials if necessary.
The password may be changed at any time.
Meeting types
When creating a meeting, there are 14 meeting types available:
- Ad-hoc
- Chairmen's meeting
- Extraordinary
- Joint meeting
- Ordinary
- Plenary
- Preparatory meeting
- Rapporteur meeting
- Resolution meeting
- Start up meeting
- Steering group
- Task group
- Workshop
- Working group
Presences types
The presence of a participant can be either:
- Present with remote participation if the person is connected via an online conference call tool (for example GoToMeeting).
- Present with face to face participation if the person is physically attending the meeting.
- Absent
- Unknown
Meeting management
This feature is access restricted (flagged with a ![]() icon) to the ETSI staff and Technical Bodies Chairmen only.
icon) to the ETSI staff and Technical Bodies Chairmen only.
The Meeting Management application is accessible here: http://webapp.etsi.org/MeetingManagement/
Create a new meeting
It is possible to create a meeting two different ways.
Note: This is open to TB Officials, Support Staff and will require an EOL.
- From the Meeting Calendar portlet: Click on the link "New Meeting".
- From the meeting management application http://webapp.etsi.org/MeetingManagement/

Click on "Create a New Meeting"
This will open the meeting creation form.

Meeting information fields
- Meeting contact: Click to enter the name of the meeting contact(s). It is possible to have more than one meeting contact. By default, it is the person creating the meeting.
- Technical Body: Select an ETSI TB from the drop down list.
- Title: Free text.
- Sequence number: free text, it is a sequence number allocated by the Technical Body (i.e ERM#47, ESI#36, etc).
- Generated meeting reference: unique and automatic number identifying the meeting.
- TB, Seq and Title boxes: Preferences on how the meeting should appear on the portal (Identified by its meeting sequence and/or only the title for example).
- Meeting type: Select the meeting type from the drop down list. See the different meeting types here: The different meeting types.
- Location: Tick either ETSI premises in Sophia Antipolis or in another city, then select the country in the drop down list. For ETSI, the country is set by default.
- Start and end time of the meeting
- Registration starting time: By default, time is set to 30 minutes before the starting of the meeting. (i.e: an update of the meeting start time field will cause an update of the Registration time field)
- Time zone: Select the time zone from the drop down list.
- Presence type allowed: Select from the drop down list between the 3 types of presence:
- - Face to Face only
- - Online only
- - Face to Face and Online
- Estimated number of participants: free text. This information is important for our Meeting Support team in order for them to size the need and provide the best options available.
- URL for meeting information: Free text. You may provide the website address of the host or any other relevant information
- Additional meeting information: Free text.
Meeting options fields

- Record own presence: Indicates if registered users have the rights to confirm their own presence information (see more information here)
- Registration to external users: Indicates if the meeting is open to Member users only or if external users are allowed to register as well. By default, ETSI meetings are for Members only. See the ETSI Directives http://portal.etsi.org/Directives/home.asp
- Email notification to participants: This configures which of the 3 groups may send email notifications to registered participants of the meeting. (Administrators, Super-Users, or registered users). Go to Types of users and rights for more information on types of users.
- Open registration now: By default, the registration of the meeting is open right after its creation. It may be unticked to open the registration later on.
- Chat Room: Tick/untick to enable to use of Chat room during the meeting.
- Notifications to Meeting Contact(s): If ticked, Meeting Contact(s) will receive a notification whenever a user registers to the meeting.
NOTE: There is the possibility to save these options settings as a default options values for this group/TB. Tick the box "Save these values..."
Once you have filled all the necessary fields, click on ![]() .
.
For meetings in ETSI premises:
You will have to complete a room reservation form.

- Important: Enter the number of estimated participants to the meeting.
The ETSI Meeting Support staff will look at the most suitable meeting based on the estimated number of participants.
- Check the meetings dates.
- Enter any comments or special requests in the box provided (for delegates with special needs for example).
If you need more than one meeting room, click on “Request Another Room”;
Otherwise, click on “Save Request”.
For meetings outside ETSI premises:
The meeting creation will be done.
A screen will show the Meeting name with a link and the Meeting Identifier.

From this screen, you may go back into the modification of the meeting, or go back to the Meeting Management menu.
Modify/Update a meeting
From the Meeting Management menu:
Click on the "Modify a Meeting" link.
In the list of meetings, select the one you wish to modify and change the information accordingly.
From the Meeting details page:
Click on “Administration”, then “Update meeting” links

Make the appropriate changes and click “Update Meeting”.
Cancel a meeting
From the Meeting Management menu:
Click on the "Cancel a Meeting" link.
Select the meeting in the Meeting Calendar.
At the bottom of the screen, below the meeting details form, click the "Cancel Meeting" button.

The system will show a confirmation screen as such:

A cancelled meeting will appear as cancel on the Meeting Calendar view, as such:

The cancellation information also appears on the meeting information view:

View the ETSI room allocation
This feature is available to Administrators and Super-Users only.
See the different users’ types here: Types of users and rights.
In the Meeting Management menu, click on the “View Room Allocation” link.
The Room Allocation table is organized per week. By default, it will show the current week on 5 days business days (from Monday till Friday).
You may browse week by week with the buttons "Previous Week" and "Next Week".

It will display the different room available in ETSI with the number of seats in brackets (i.e. the AMPHI IRIS room may contain 70 participants maximum).
It is possible to access the meeting details by clicking on the meeting name.
You may customize the search and view of the meeting room allocations:
Click on the "Selection By Date" button.

- Enter the date, the tool will display the corresponding week.
- You may select whether to see rooms of the Main or both buildings.
- Select if you want to see the 5 business days only or if you want to see the whole 7 days.
Click on "View" to run your query.
Reserve an ETSI meeting room
This feature is available to Administrators and Super-Users only.
See the different users’ types here: Types of users and rights.
In the Meeting Management menu, click on the "Room Reservation" link.
This will display the current and future meetings being held in ETSI premises only.
Click on the meeting for which you would like to request or modify the meeting room.
- Important: Enter the number of estimated participants to the meeting.
The ETSI Meeting Support staff will look at the most suitable meeting based on the estimated number of participants.
- Check the meetings dates.
- Enter any comments or special requests in the box provided (for delegates with special needs for example).
If you need more than one meeting room, click on “Request Another Room”
Otherwise, click on “Save Request”.
- .
Meeting invitation
Upload the meeting invitation and details
The meeting invitation can be uploaded at the meeting creation or later on.
To upload the meeting invitation at the meeting creation.
- Click on the
 button on the meeting meeting creation form.
- Click on the
- Select the file on your computer. If not zipped already, the system will zip your file and upload automatically.
The name of the document will appear underneath the upload button.

To upload the meeting invitation after the meeting has been created:
- Click on the Administration > Update Meeting link
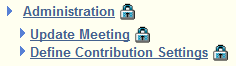 on the meeting details page.
- Click on the Administration > Update Meeting link
- Click on the button on the meeting creation form.
- Click on the
- Select the file on your computer. If not zipped already, the system will zip your file and upload automatically.
The name of the document will appear underneath the upload button.
IMPORTANT: Information contained in the Additional Information box is NOT retrieved by the system. (such as a picture, map, room number, GoToMeeting details, etc.)
You MUST include this additional information in the meeting invitation; either in a separate file and zipped with the invite or in the invitation itself.
NOTE 1: You can overwrite the meeting invitation by following the same instructions above.
NOTE 2: To remove the meeting invitation completely, please contact the ETSI support staff.
Meeting contributions settings
This interface is used to define the meeting contributions settings and properties such as:
- the contribution period (reservation date range to contribute to the meeting)
- the handling of late contributions upload
- the contribution numbering scheme
In order for the users to upload a contribution and assign to a given meeting, the settings and properties shall be set.
Access to the interface requires an EOL account and is accessible for Super-Users or Admin only.
Define the meeting contributions settings
The interface is accessible from the meeting details page.
- Click on the Administration > Define Contributions Settings link on the meeting details page.
- Click on the Administration > Define Contributions Settings link

NOTE: The link is named "Define Contribution Settings" for meetings whose properties have not been defined yet.
Once the parameters have been set, the link appears as "Meeting Contributions Settings".
- A new screen appears with all the parameters.
General Contributions Settings
The following General parameters may be set:

- General Properties:
- Reservation Start Date: Select the date for the start of the contribution reservation range.
- Note: By default, it is set to start the current day and time.
- Reservation End Date: Select the date for the end of the contribution reservation range.
- Note: By default, it is set to finish one month after the end of the meeting.
- Block upload outside reservation date range: Tick to enable this feature.
- Late Contribution Threshold: Tick the "Enable" box to access this feature. It will allow to flag as "Late" any contribution reserved or uploaded after a defined date.
- More information available on the Contributions application: Contributions HelpFiles.
Here below is a figure explaining the "contribution period".

Flags are automatically calculated by the system.
If a Chairman decides to update the Late Contribution Threshold date and that contributions have already been reserved
for this meeting then the system will re-calculate all the flags for the existing contributions.
TB Officials and Support staff have the right to manually update the value of the flag by clicking on the flag icon
- Red Flag: The contribution is “late”, If the TB official wish to turn off this “late” indication, he will click on the flag to turn it to white flag (Forced “not late”).
- Green flag: The contribution has been put on time on the server.
- White flag: The contribution flag has been forced to “not late”.
Note: To update the value of a flag for a given contribution, go to the contribution details window and click on the EDIT button, click on the flag to change its value from Late to Forced not late

Contribution Numbering Settings
The following Contribution Numbering parameters may be set:

- Contribution Numbering Model:
- Contribution Name Structure: The contribution numbering scheme is constructed as indicated below:
TBName(YY)XXXZZZ --> <CommunityId>(YY)<MeetingPrefix><contribSeqNb>
- Meeting Prefix: Optional.
- It is defined on a per TB and meeting basis. These 3 characters are alphanumeric.
- It can either be used to reflect the Meeting reference in the contribution number; or to keep the yearly contributions numbering scheme.
- Contribution Sequence numbering: IF the Meeting Prefix is defined THEN the numbering will start starts at 001 until the last contribution linked to this meeting is reserved and/or the reservation end date is reached.
Once set, click on the ![]() button.
button.
A screen will confirm the settings that have entered.

From this screen it is possible to go back into the properties by clicking on the ![]() link.
link.
- It is possible to see when the meeting contributions settings have been parametered: In the meeting calendar portlet, the little
 icon flags meetings for which the contribution is open.
- It is possible to see when the meeting contributions settings have been parametered: In the meeting calendar portlet, the little
Modify the meeting contributions settings
From the meeting details pages, click on "Meeting Contributions Settings" link

On the new screen click on the ![]() link to activate the fields that may be changed.
link to activate the fields that may be changed.

See for more information on the different parameters: General settings and Numbering settings.
Once the changes have been done, click on "Save Changes to Contribution Settings".
Contribution block reservation
Contribution block reservation is a feature that allows to pre-reserve a range of contributions for a meeting by re-using and copying titles, sources, etc. of existing contributions from previous meetings.
This can be typically used when TB meetings have a recurring pattern for their first contributions (invitation, agenda, IPR call, Status of WPM, WG reports...).
To open the block reserve contributions screen, click on the link Reserve a block of contributions


The system opens the block reserve screen:

Select the source meeting from which you wish to retrieve the contributions. The system imports all contributions title from this meeting in the FROM and TO drop down menus.
Select from these menus the range of contributions you wish to import and click on the ADD button.
The system imports all the titles in the Block reservation Range grid.
Use the two arrows on the right hand side of the grid to re-arrange their order.
You can update the title by clicking on a row to edit the content and update it.
Use the red cross to delete an entry.
NOTE: you can add as many as contributions as you want. You can select contributions from one to many meetings in a row.
Warning: Contributions of type New Work Item and drafts cannot be imported in the block reservation grid.
In the above example, the contribution numbering starts at number 4 as it was indicated in the meeting settings details screen to start at that number.
You can indicate such information by entering your data in the following field:

In case of joint meetings with TBa and TBb it is possible to contribute from both TBs, and hence the meeting will contain contributions from TBa and TBb.
When importing contributions from past TBa meeting to the joint TBa and TBb meeting,
the resulting block reserved contributions will have TBa identifiers and
when importing contributions from past TBb meeting to the joint TBa-TBb meeting, the resulting block reserved contributions will have TBb identifiers.
Block reservation is not limited to the contribution reservation period, it can also be done before the meeting reservation period.
To validate the block reservation range, click on the Proceed to block reservation button.
Manage Meeting Allocations
To access the meeting allocation management features, go the meeting details, click on “Administration”, then “Meeting Contributions Settings” and then click on the link "Manage Allocations":

Create a meeting allocation
To create a new meeting allocation, enter the allocation name and description (this field is optional) and click on the “Add New” button.

- NOTE: This way of entering allocations requires to create them one by one.
Export/Import Allocations
It is possible to export allocations from any past meeting in a text file and to import them in a future meeting. To import allocations from a previous meeting, click on the import allocation from file" and select the file from your PC. File format may be a .txt or .csv.
- NOTE: For the csv file to be accepted by the system, do not use curly quotes, use straight quotes only.
To export allocations into a .txt file, click on "Export allocation to file" and save the document on your drive.
Meeting participants management
Register a participant to the meeting (for Super-Users)
A meeting contact or TB Official may register an ETSI delegate on his/her behalf.
From the meeting information view or from the meeting calendar view, open the “List of Participants”.
PIC15a
A new screen shows the list of participants currently registered.

Click on "Add Participant"
A new window will open with an empty form.

Type in Family Name, or Given Name, or Email: a list of matching entries found in ETSI directory will show up

Select the name from the drop-down list and proceed with the registration.
If you did not select the right person, you can go back to the previous screen by choosing “None selected” in the “Are you looking for” drop-down list.
Or select the role of the person (if any) from the “Will attend as” drop-down list and submit the registration. A successful registration message will appear.

A quick way to add participants consecutively: choose the “None selected” item again, which will reopen the “Add participant” window.
If the user is not authorized to attend the meeting, a message will appear once you have selected the person.

Participants presence and status
Participant’s status and presence features enable to manage the participants’ information.
This describes how Users and Super-Users (see Types of users and rights) will be allowed to maintain the presence information via the meeting participant lists.
Presence Status: This information confirms the actual user participation to a meeting. It can either be:
- P for “Present”
- A for “Absent”
Presence Type: This information indicates whether the user attendance is (or will be):
- ” Face to Face” (F2F)
- ” Online” (remote online meeting tool such as GoToMeeting).
Administrators and Super-Users have the right to update the presence information (User presence status AND user presence type) of any registered users via the meeting participants list screen.
NOTE:” Super Users can update the presence information only during the presence recording period. Administrators can update the presence information at any time
NOTE: The presence recording period is from meeting_start_day to (meeting_end_day + 7 days) .
Update your presence status (for Users)
This is possible to update your presence status only when the meeting option “Allow users to record their own presence” is activated.
To update your presence type, you click on “Update my registration” from the Detailed Meeting Information window.
To update your presence status, you click on the presence icon on your line of the participant list
Update a participant's presence status and type (for Super-Users)
Super-Users and Administrators (see Types of users and rights) have the right to update other users’ presence information .
Select the appropriate presence type and status. The screen will refresh with the new information.
NOTE: Super-Users and Administrators can force the presence type to a value that is not allowed in that meeting.
For example, the Chairman can mark a participant with Online presence even if the meeting is Face to Face only.
NOTE: The presence recording period is from meeting_start_day to (meeting_end_day + 7 days) .
Send emails to meeting participants
In some cases, a meeting organizer, a TB official, a host, or a meeting participant may need to send rapidly some information targeting all or some of the registered participants to a meeting.
It could be to inform of the meeting cancellation, or change of meeting room, start time, GoToMeeting URL, etc. Also, an email can be useful to notify new documents (i.e presentations, draft report, etc.) only to the actual participants rather than the whole Technical Body mailing list.
The feature may be enabled at the meeting creation and updated later on via the meeting details page.
NOTE: It is possible to disable this feature per meeting, and as a TB preference.
- The list of authorized senders can be configured.
- This feature is available before the meeting and 7 days after the end of the meeting.
Define the authorized sender(s)
At the meeting creation:
In meeting creation form, in the Additional meeting options section:

Choose the authorized senders from:
- Administrators (TB support staff)
- Super-Users (Meeting Contact(s) and TB Officials)
- Registered participants to the meeting
You can select only one option, but each option includes the list of users with higher privileges
You have the possibility to set this setting as the TB preference for future meetings.
Tick “Save these values as default options for this group”.
After the meeting has been created:
Go to the meeting details page, expand “More options” and click “Update Meeting”.

Scroll down to the Additional meeting options section and follow the explanations given above.
How to send an email to the meeting participants
To send an email, you open the participant list and click on “Email to” button.
By default, the email is sent to all participants. You can also send the email to a selected participant.

It opens a mail editor where you can write your subject and body. By default, the BCC option is enabled. (“Hide list of recipients”).

Other features
Meeting survey
A short survey via Survey Monkey is available to all ETSI meeting participants in order to assess their satisfaction with the meeting and the ability to submit comments or suggestions.
The survey composed of 10 questions is aimed at assisting better the ETSI members and improving the support of future meetings.
Access the survey after meeting
On the meeting details page, click on the link “Meeting Survey”:

A new tab or window will open (depending on your browser settings) with the questionnaire.