WPHV: Difference between revisions
| Line 131: | Line 131: | ||
===Attach/detach Work Items to/from nodes/sub-nodes in a Work Plan=== | ===Attach/detach Work Items to/from nodes/sub-nodes in a Work Plan=== | ||
===GANTT chart view of | ===GANTT chart view of Work Item projects=== | ||
==Additional functionalities== | ==Additional functionalities== | ||
Revision as of 14:58, 22 February 2011
Scope of the Work Plan Hierarchical View application
This application aim is to provide a tool which allows a hierarchical organisation of Work Items, this by displaying WIs from theETSI work programme in a tree view. The tree will be constituted of "nodes" and "leaves". The "nodes" are topics, their positions define the hierarchical structure, but these "nodes" do not contain any work programme data. The "leaves" are Work Items from the ETSI work programme and are hierarchically attached to the "nodes".
This hierarchical system can be used for:
- Organizing and managing work items
- Providing a better understanding of the relations between WIs
- Handling work areas across multiple ETSI Technical Bodies
- Displaying WI project part of a Work plan in a GANTT chart style view.
Definition of roles and access rights
- Coordinating Editors
The Coordinating Editor can update and delete the nodes for which he has been granted update rights as well as any node descending from one of his nodes. He can attach/detach leaves (Work Items) to/from his nodes as well as to/from any node descending from one of his nodes. He can only create a new node under one of his nodes or under a node descending from one of his nodes.
- Tree Authors
The Author has the same access/update rights as the Coordinating Editors and he can also change the Work Plan attributes (except the tree depth). He can also manage the Coordinating Editors.
- Tree Owner
The tree owner has the same rights as Authors and he can delete a tree he owes (flag as hidden). He can also manage the Authors and can change the Work Plan Owner.
Create a new Work Plan in a Hierarchical View
Actors: TB support staff
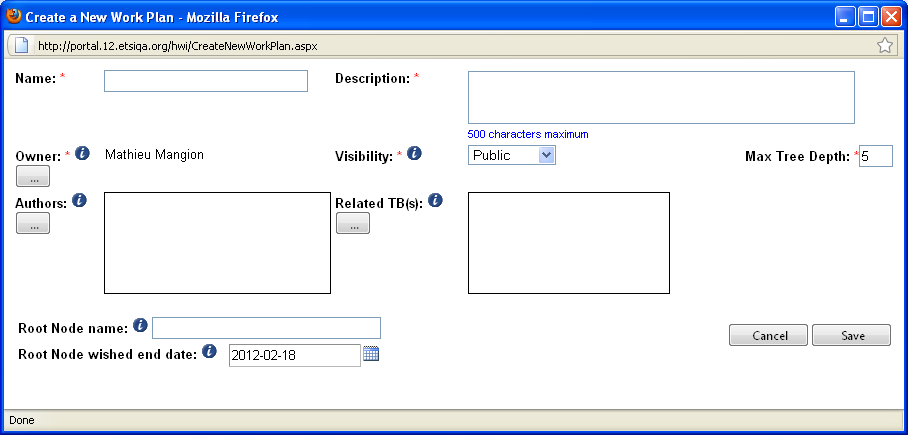
In order to create a Work Plan in a Hierarchical view, you first need to be logged in to the portal. Click on the "create new" button in the portlet. The following creation screen is displayed:
The system displays an empty form which you are asked to fill in. Some of the attributes are mandatory:
- Name: This is the title of your Work Plan
- Owner: The system retrieves automatically the name of the user who has created the WPHV and put it as owner, nevertheless this entry can be modified. There is only one owner.
- Authors: this type of role allows the identified users to update/delete all leaves (Work Items) and all nodes (General Topics) of the tree (Work Plan). They can also change some of the tree attributes:
- Description
- Related TBs
- Add/remove Coordinating Editors
- Description: You can type text to give information on the Work Plan you intend to create.
- Visibility: There are three types of visibility.
- Public: Everyone can see the tree in a GANTT chart view style (i.e. Even non logged users), Owner, Authors and Coordinating Editors can update the attributes of this work plan.
- Restricted: Only Owner, Authors and Coordinating Editors have access (read/write) to the work plan.
- Private: Only the Owner of the Work Plan can view and edit it.
- Max tree depth: The system sets five as a maximum Work Plan depth, but if the owner of the work plan needs more tree depth, then you can contact your system administrator who can set the tree depth up to nine maximum.
- Related TBs: As the structure of a Work Plan is not dependent (linked to) on a specific Technical Body, a tree can then span across several ETSI TBs, even all.
- Root node name: The system retrieves automatically the name of the Work plan to name the first node of the tree.
- Root node wished end date: Please select the end date of your work plan.
Click on the "SAVE" button, then the system refreshes the WPHV portlet with the newly created work plan and the owner can start to update his Work Plan.
Update Work Plan
Lock/Unlock Work Plan
In order to avoid concurrent update of a work plan, a simple lock/unlock mechanism has been put in place. This allows Coordinating Editors, Authors and Owner to modify part of the work plan.
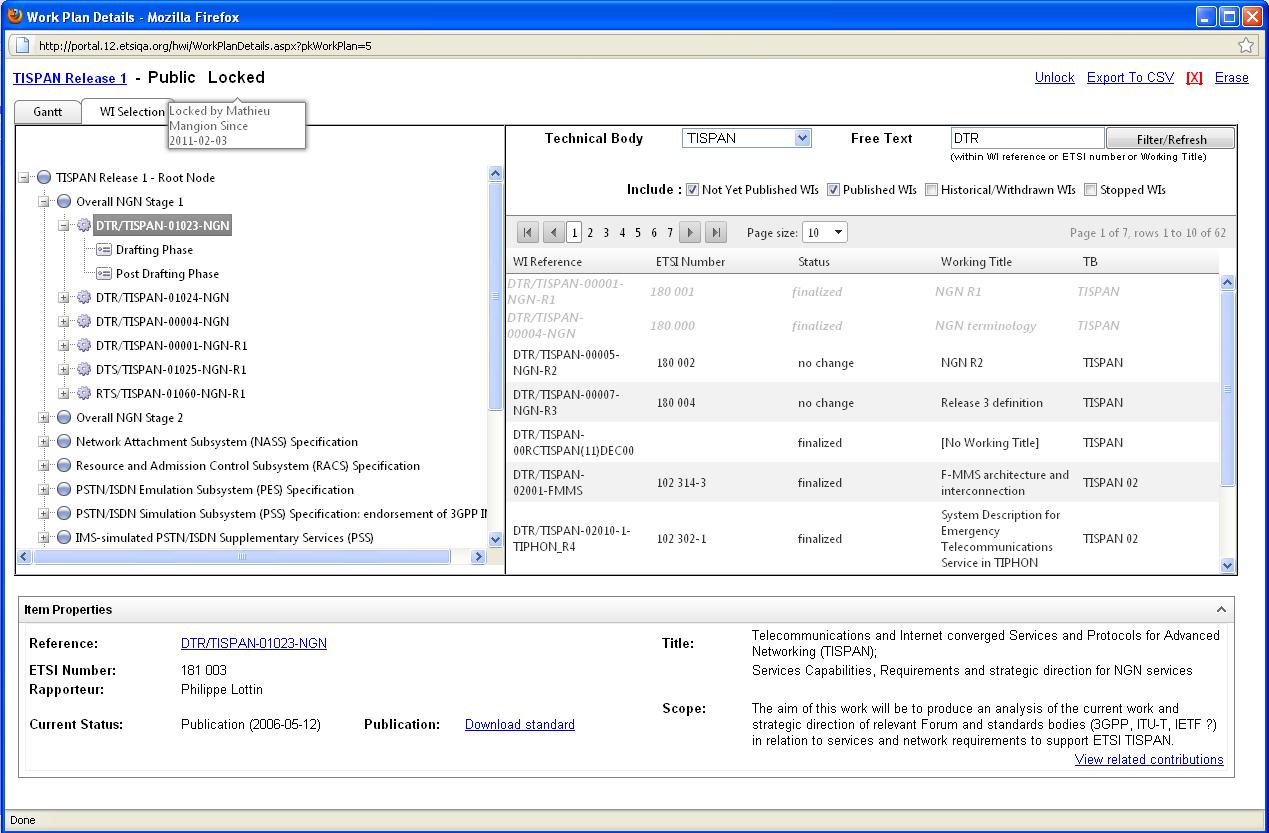
Below, an example of a Work Plan which has been locked to allow the user to allocate Work Items to special topics:
Note: If a work plan is locked for editing, then only the person who locked it can modify it. It important to remind to unlock the work plan when leaving the application in order to allow other authorized users to update the Work plan.
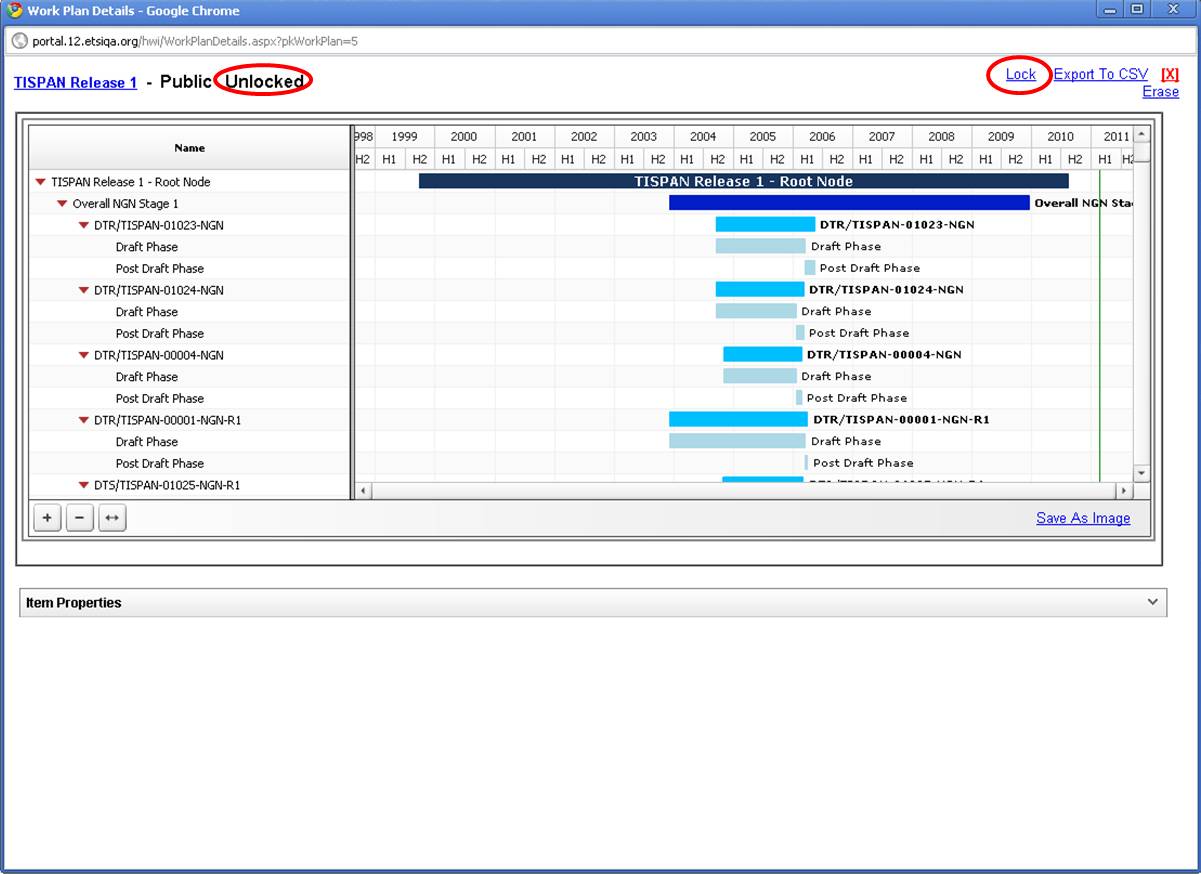
Who can unlock a Work Plan and how to unlock a Work plan? The user who locked the tree will be able to unlock it. If there is already a lock on a work plan, it can be removed by a user that has a higher set of permissions. To unlock a work plan, please click on the unlock link at the top right of the screen. This "UNLOCK" link when clicked turns into "LOCK" function:
For example, a tree locked by an Author can only be unlocked by an Owner or an administrator.
Update of Work plan attributes
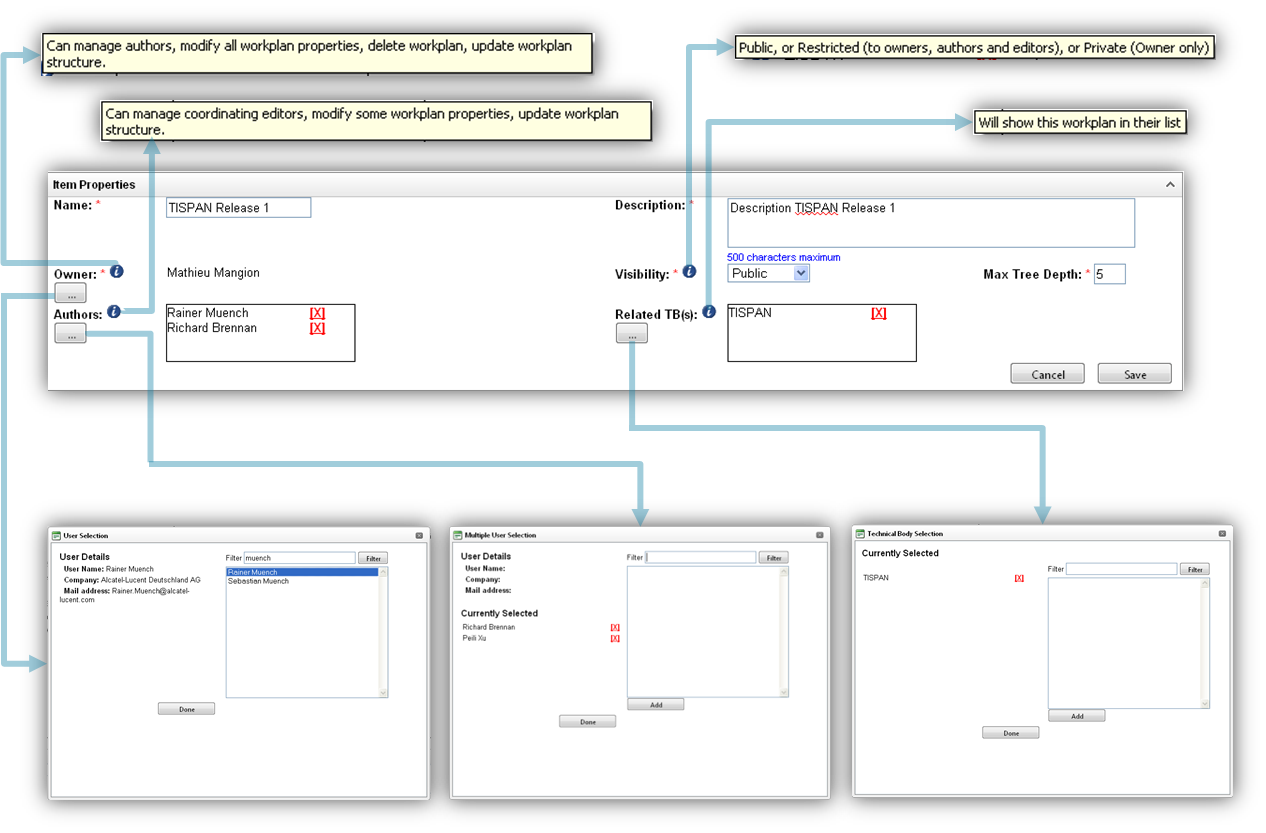
To update the details of a Work plan, you first need to lock the work plan (after having opened it by clicking on its name in the portlet WPHV). When the work plan is locked, click again on its name, then the system expand at the bottom of the page the details for this Work plan. Click on the "EDIT" button, then the system enables all the fields which can be updated, depending on the role you have been attributed on this Work plan.
Modify the attributes you want and then click on the "SAVE" button. The work plan is then updated in the database.
Creation of nodes and sub-nodes in a Work Plan and update of the node attributes
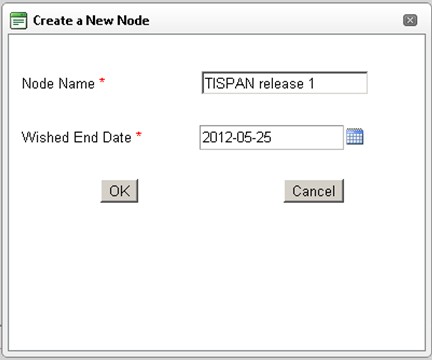
The parent node is the first node of the work plan tree. Under this node you have the possibility to create sub-nodes up to the max tree depth (default depth=5). To create a node, you need to right click on the parent node name in the hierarchy tree view, a menu appears giving you the possibility to either "create a sub-node" or "delete Node". Select the action "create sub node". A window appears asking you to fill in the node name as well as the wished end date. Please see screen below:
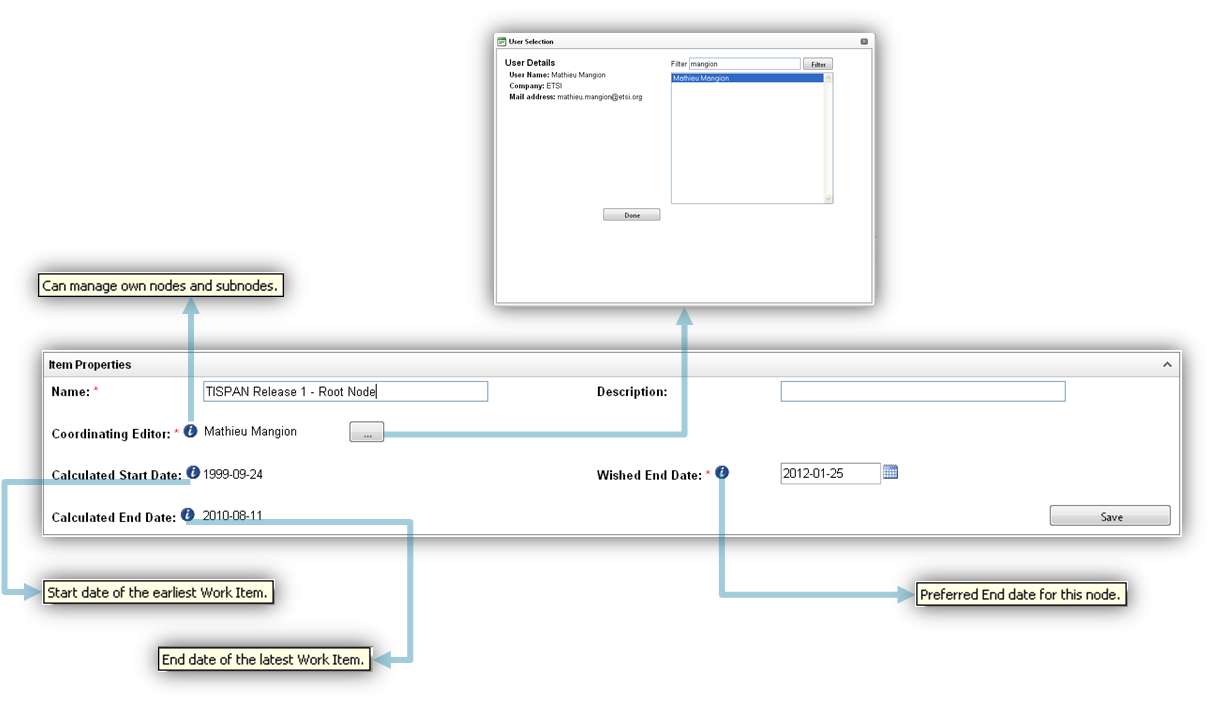
Click "OK", the system expands the lower part of the screen called "Item Properties", you can start filling in the node properties:
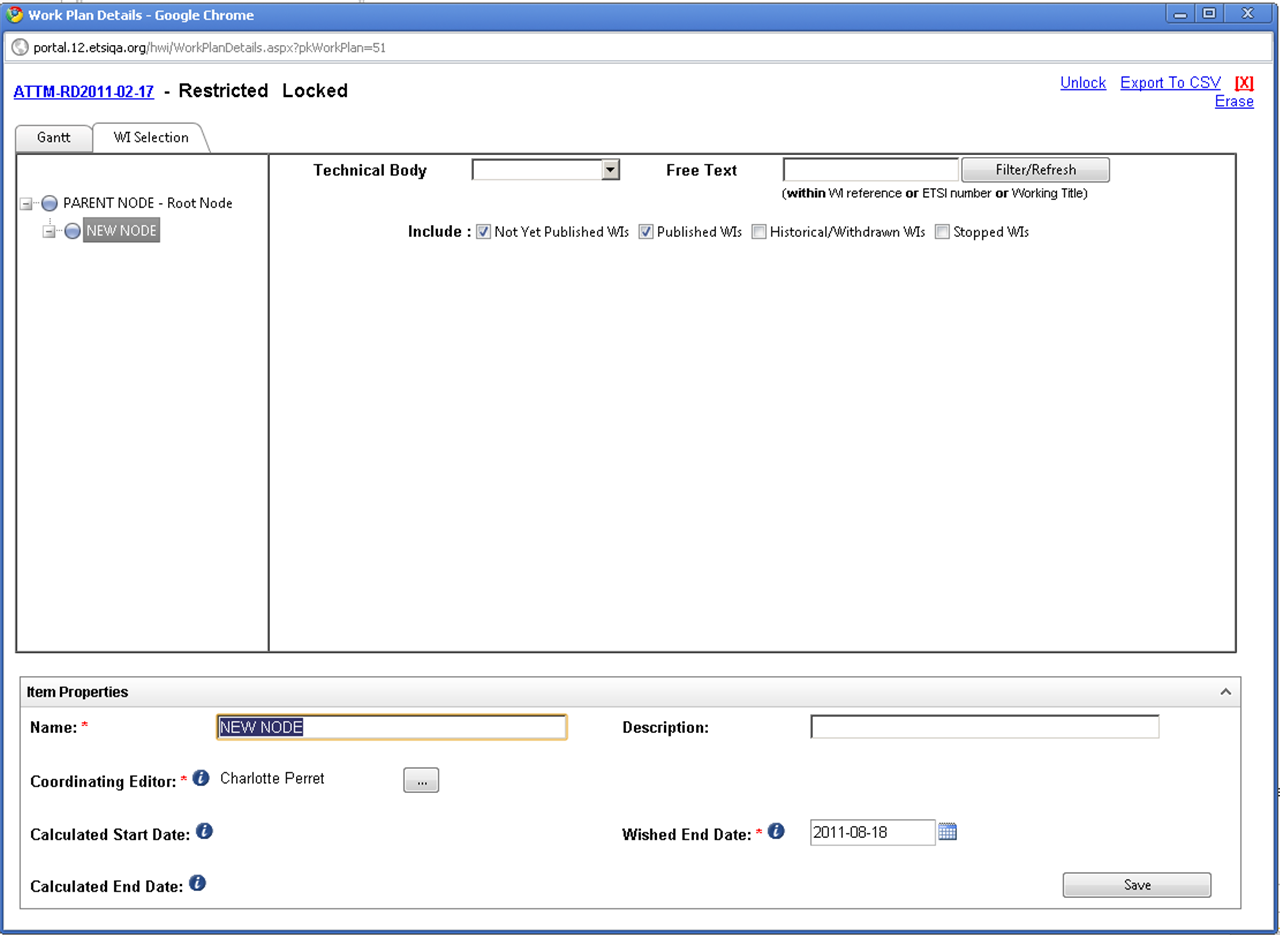
Click on the "SAVE" button, the system refreshes the hierarchical tree and the newly created node appears in the left part of the screen under the PARENT NODE:
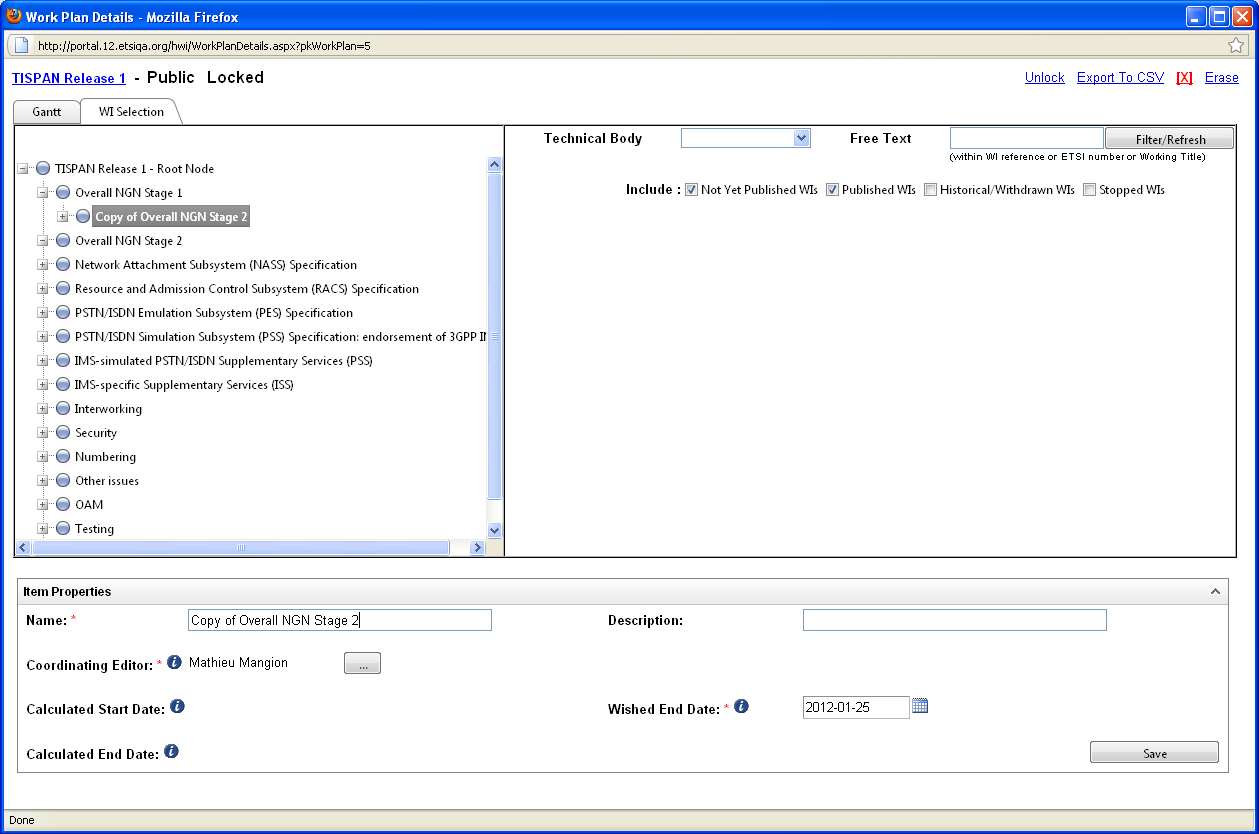
Move/Copy of node in a Work Plan
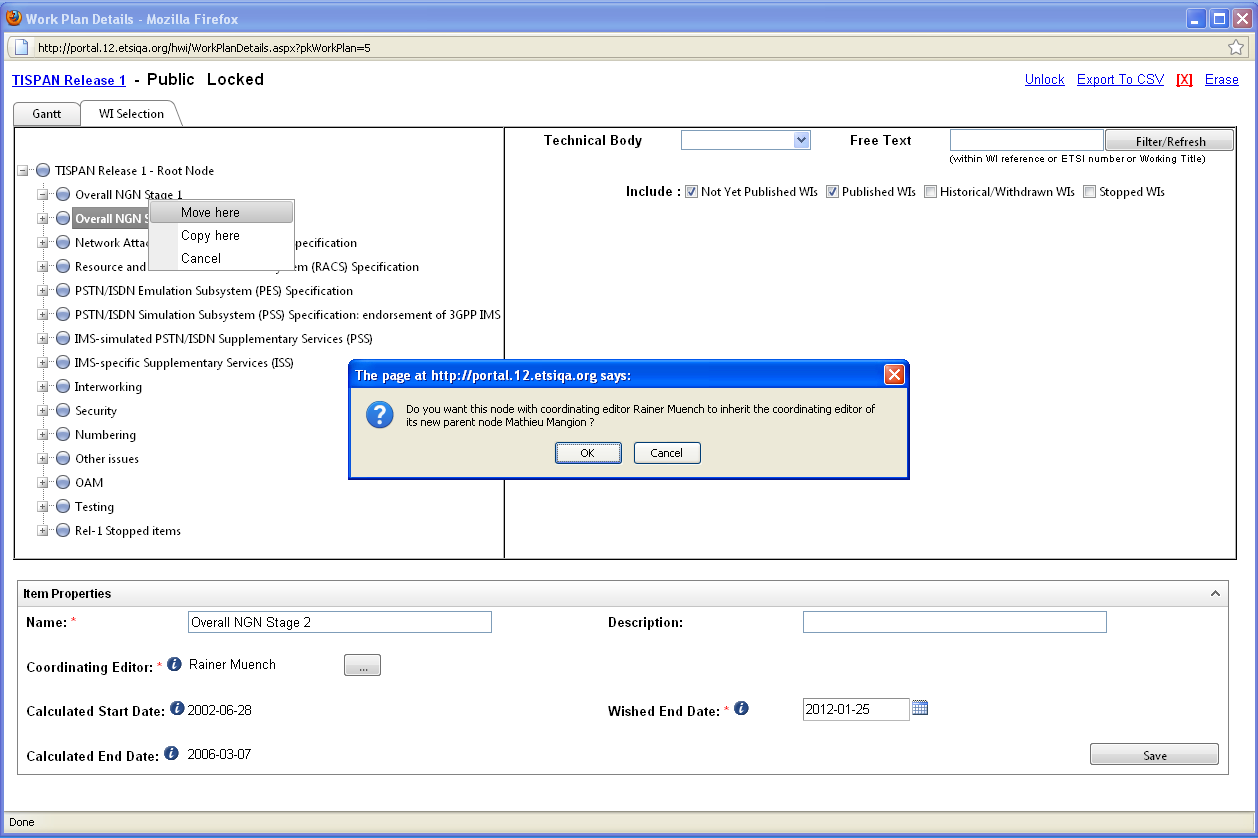
It is possible to move/copy a node from one place in the hierarchical tree to another within the same Work plan using drag and drop functionality. On mouse release:
- Move node: the node including the attached Work Items are transfered to the new location in the work plan. The system displays an informative pop-up asking you whether you wish that this moved node inherits the coordinating editor name. *
- Copy node: the node without the attached Work Items is transfered to the new location in the work plan. The copied node name will then start with copy of
