GA Proxy Management: Difference between revisions
| Line 40: | Line 40: | ||
=== Signing a proxy electronically (e-sign) === | === Signing a proxy electronically (e-sign) === | ||
When you click '''“Yes”''', after the '''“Add proxy”''' window pops up, an e-signature request will be sent to your e-mail. | |||
[[File:PIC2b.JPG|frameless|576x576px]] | |||
You will also be shown a success message (at the top of your page), with a link that redirects you to the e-sign interface. | |||
[[File:PIC2c.JPG|frameless|735x735px]] | |||
Before receiving your electronic signature successfully, your proxy is kept in '''“Waiting For Signature”''' state. Once you have signed it, its state changes to “'''Submitted”''' and you will receive a confirmation e-mail. | |||
= Withdrawing a proxy = | = Withdrawing a proxy = | ||
Revision as of 12:29, 11 March 2020
Giving a proxy to a person registered to an ETSI General Assembly
Being an official contact of an organization, you can give a proxy to a person who will attend the meeting.
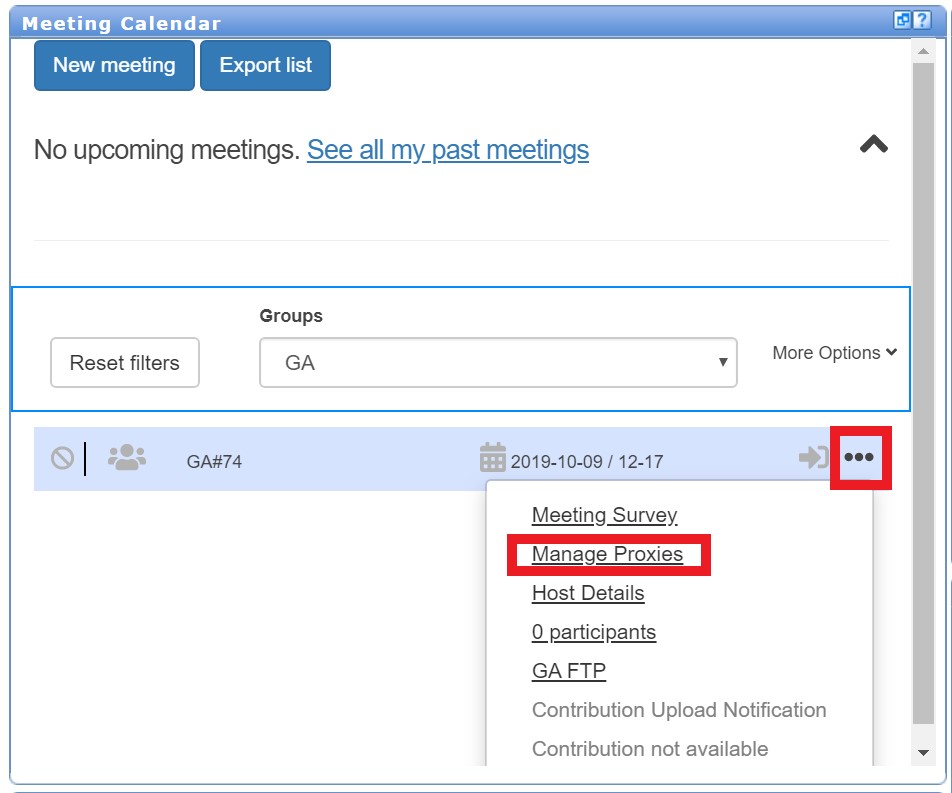
Select the GA meeting in the meeting calendar for which you wish to give a proxy.
Click More Options on button, and Select “Manage Proxies”
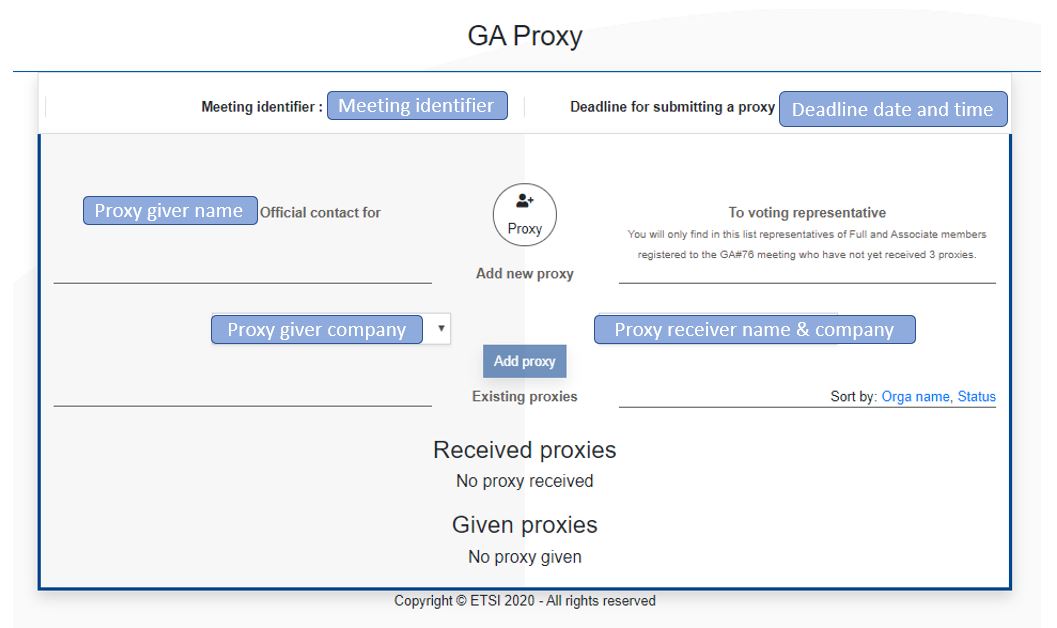
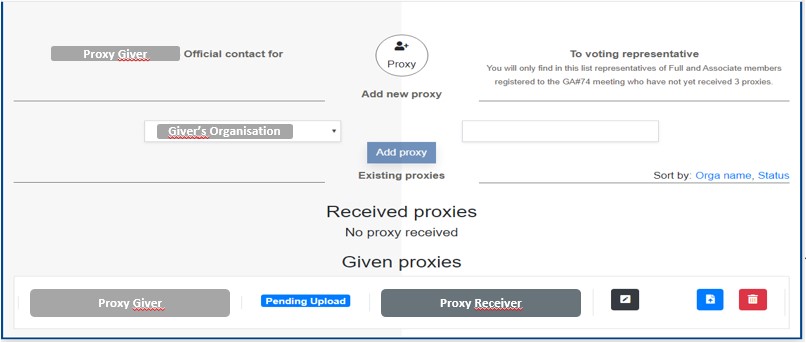
You will then see this page showing your given and/or received proxies, if any (see picture below). The first time you click on “Manage Proxies”, the list of given proxies is empty.
Note: this page contains also a list of received proxies, in case you attend the meeting and have been given proxies. Ignore this list when you are a proxy giver.
To give a proxy, select (in the left text box) the organization for which you want to give a proxy. After, type the proxy receiver person's name (or name of his/her company), in the text box and select the person you want.
The proposed list of persons contains only the list of persons who are registered to the meeting and who have not already been given a maximum number of proxies. Please note that you can only provide one proxy for each company that you represent.
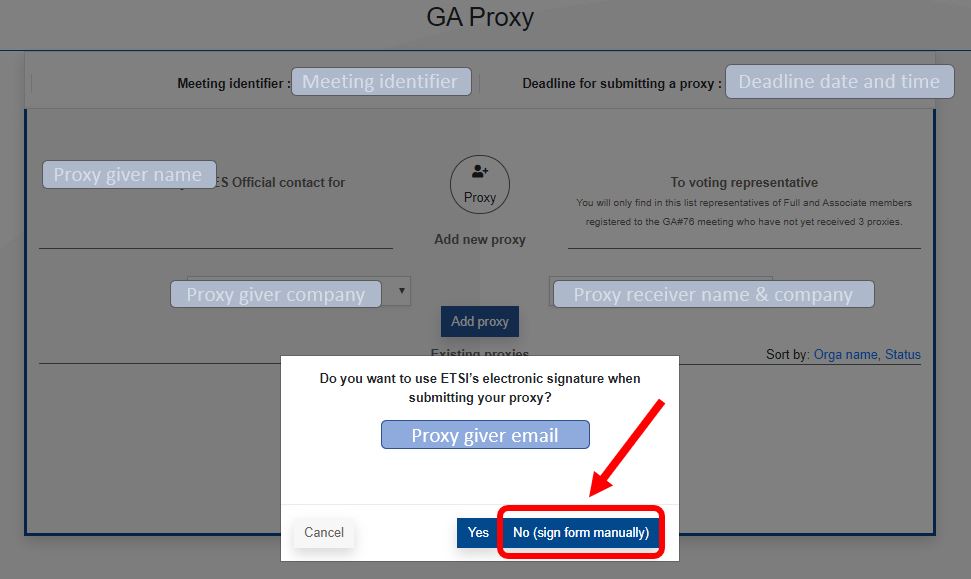
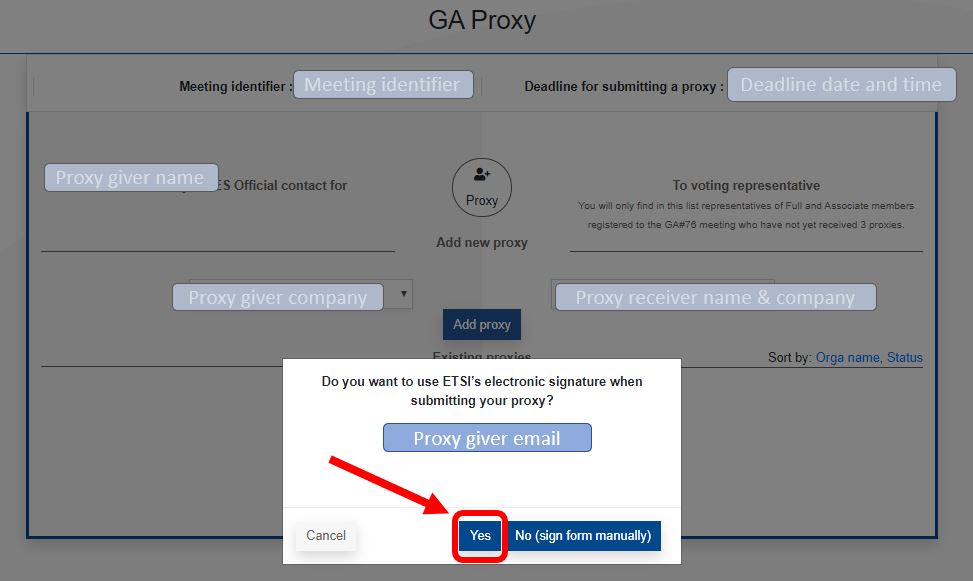
Click “Add proxy”. It opens a new window that gives you the instructions. You are able to choose between an electronically-signed (e-signed) proxy, or a traditional (manually-signed) one.
For creating a proxy and signing it electronically, click on the “Yes” button.
If you prefer to download, print, and sign (manually) your proxy form, then click on the “No (sign form manually)” button.
Signing a proxy manually
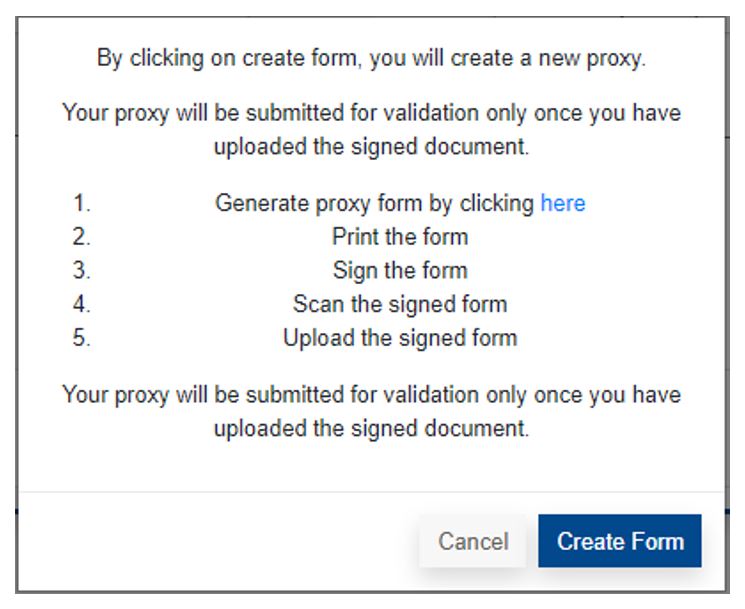
Download the form to your computer and click “Create Form”. You will be redirected to the previous window and see that the proxy has been recorded and is in “Pending Upload” state.
Print, sign and scan the downloaded proxy form, then upload it using the “Upload” icon.
You will receive a confirmation e-mail. At this stage, your proxy has been submitted but not yet validated by ETSI Secretariat.
Signing a proxy electronically (e-sign)
When you click “Yes”, after the “Add proxy” window pops up, an e-signature request will be sent to your e-mail.
You will also be shown a success message (at the top of your page), with a link that redirects you to the e-sign interface.
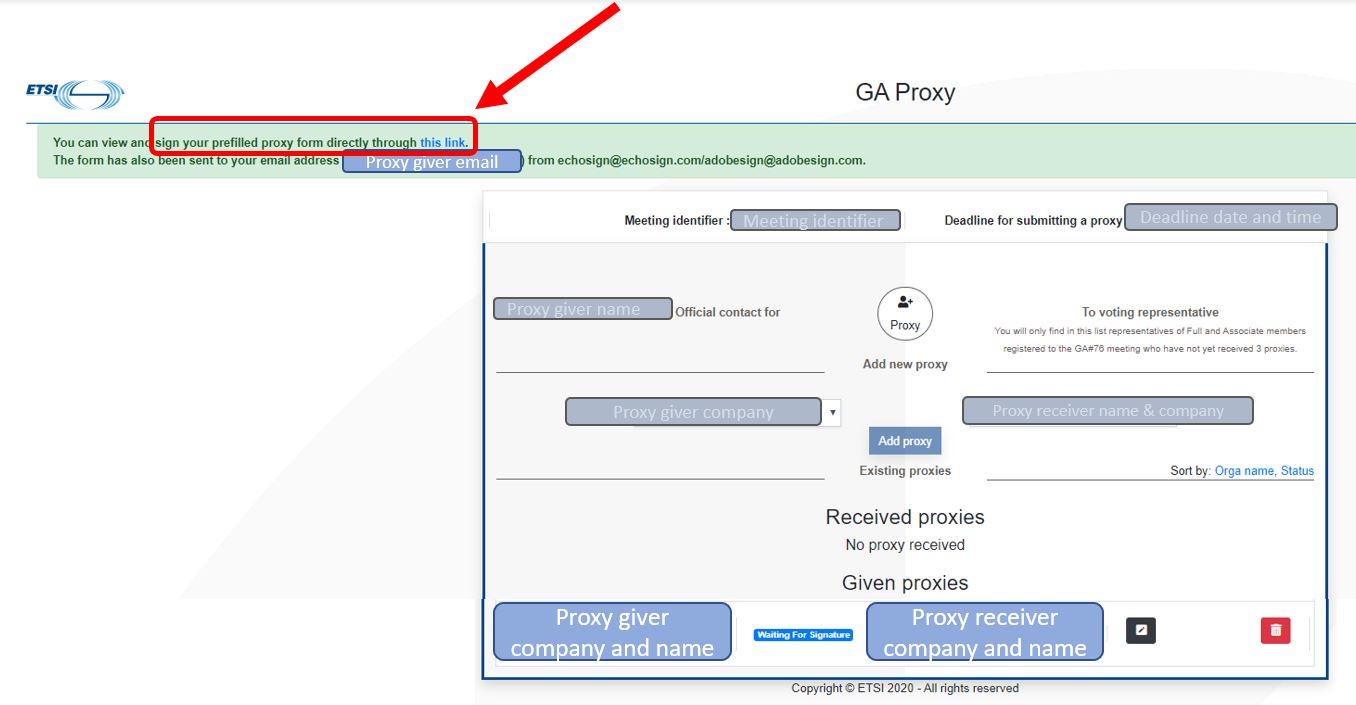
Before receiving your electronic signature successfully, your proxy is kept in “Waiting For Signature” state. Once you have signed it, its state changes to “Submitted” and you will receive a confirmation e-mail.
Withdrawing a proxy
You may decide to withdraw a proxy at any time, till the end of the meeting.
Open the page of given proxies using “Manage Proxies”.
Select the concerned proxy and click on the “Withdraw” button.
The proxy receiver and you will receive a confirmation e-mail.
Viewing received proxies for an ETSI General Assembly
When someone gives you a proxy, you receive a mail. You can also see the list of received proxies.
Select the GA meeting in the meeting calendar for which you have received a proxy.
Click on More Options, on the button, and select “Manage Proxies”
The “received proxies” part shows the list of received proxies.
