Contributions old: Difference between revisions
| Line 164: | Line 164: | ||
Attach your contribution to a related contribution | Attach your contribution to a related contribution | ||
To do so, repeat the same actions as for "Add related Work Item" | To do so, repeat the same actions as for "Add related Work Item" | ||
Your contribution can now be Saved. | |||
Note: The information in relation to Meetings, Related Work items and related contribution are not mandatory, the contribution can be saved as soon as you have indicated the attributes from the General Tab. | |||
Revision as of 17:41, 28 May 2010
CONTRIBUTION SEARCH
In order to access the contribution application you first need to be logged in to the ETSI portal (http://portal.etsi.org). Then select a Technical body/Working Group/Task Group. On this page you will see a new Contributions portlet appearing. From this portlet you can see the following buttons:
- Contribute - Search
Click on the search button to access the contribution application search functions.
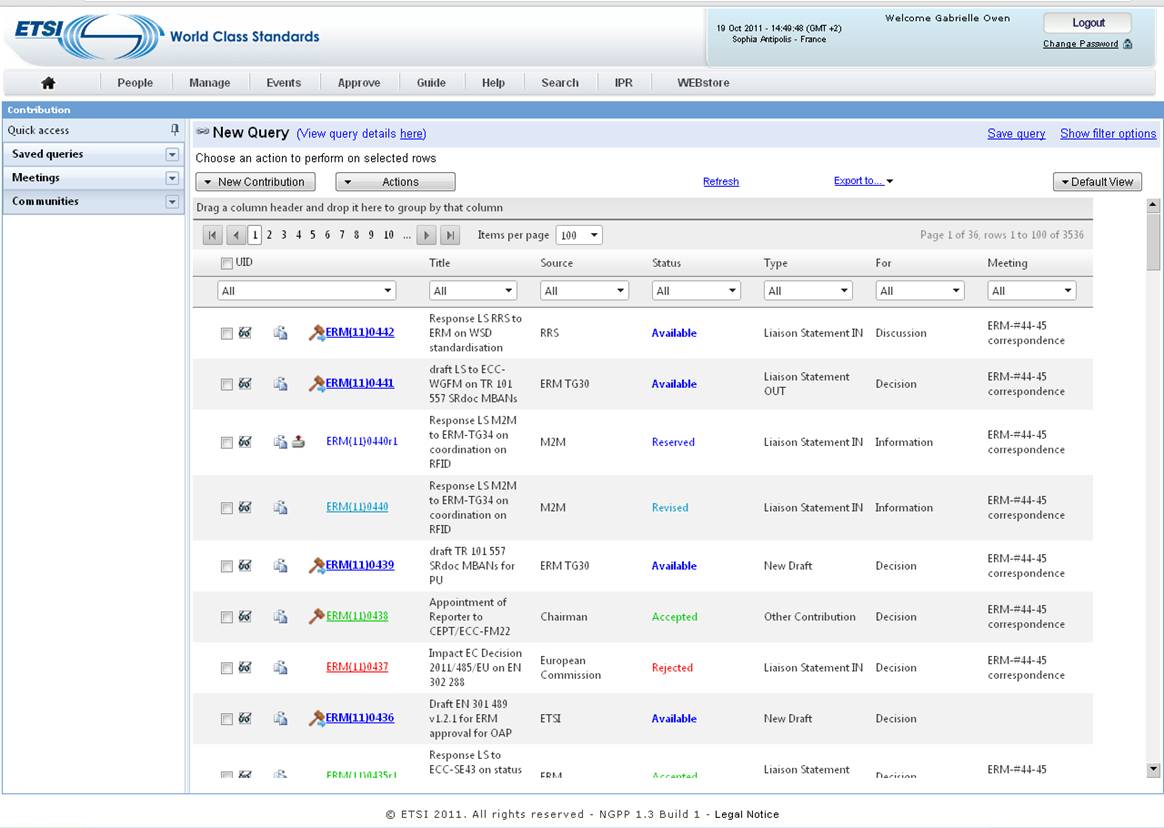
The search main screen is used to find a specific set of contributions depending on certain criteria.
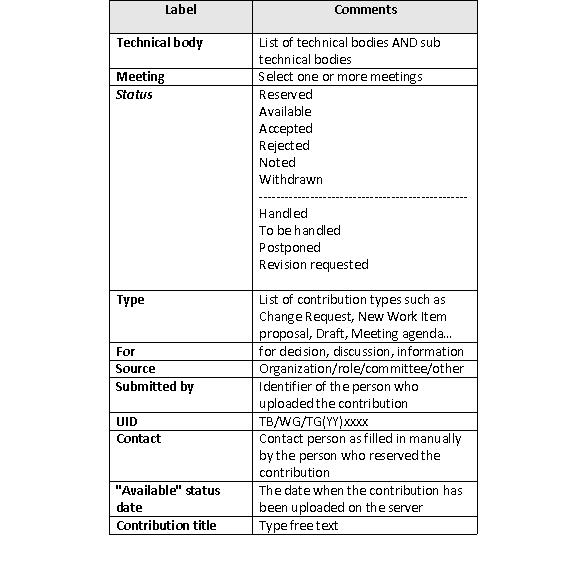
From this screen you can specify the context in which your search will be performed. The list box ‘’Available Criteria list’’ proposes the following criteria:
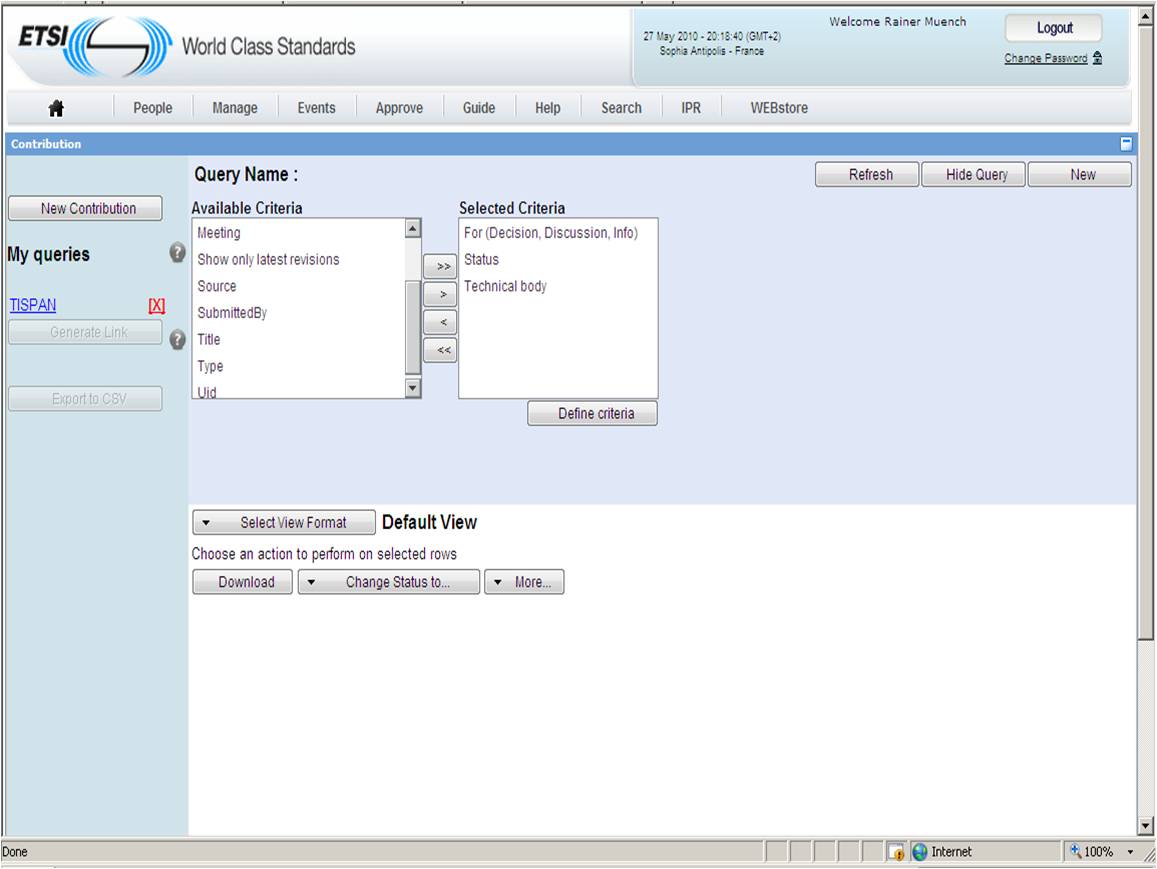
Select one criterion and click on the button in order to move it from the "Available Criteria list" to the “Selected Criteria list”, repeat the action should you wish to add other criteria. To select all criteria at once click on
. When your selection is finished click on
![]() See screen capture below:
See screen capture below:
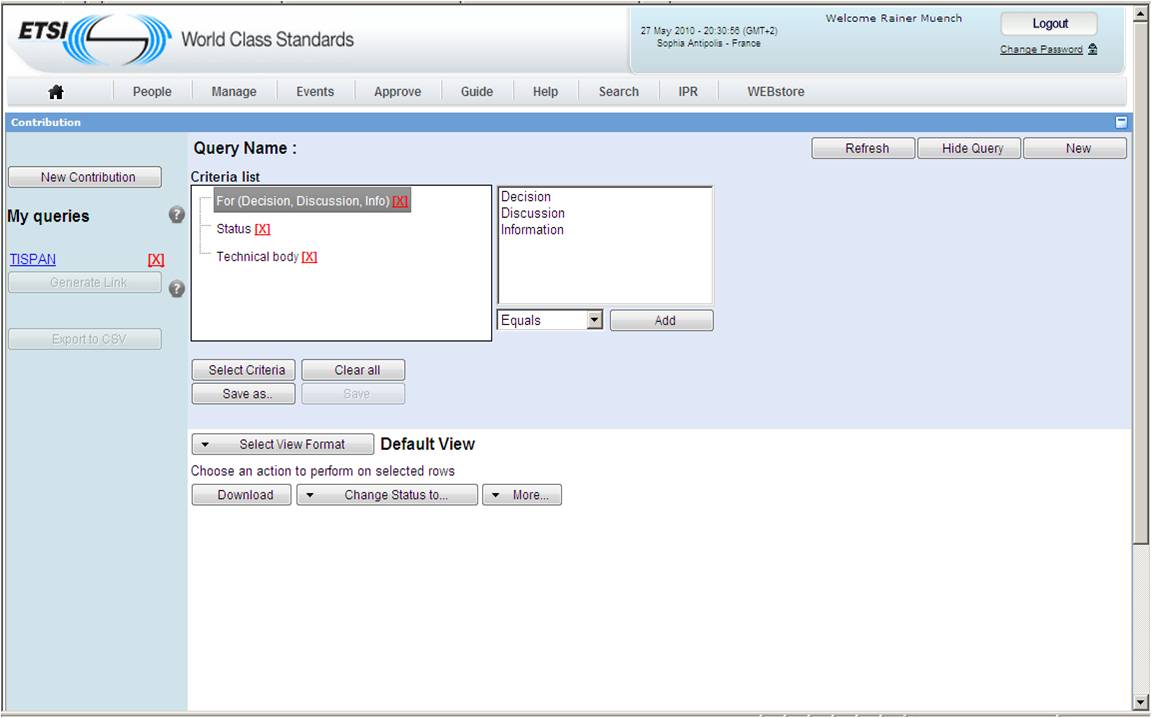
In the next screen, a list box ‘’criteria list’’ recollecting your chosen criteria is displayed. In order to define your criteria value you first need to select one of your criteria from the ‘’criteria list”. The right part displays the criterion value.
Note: The criterion value and the operator selection depend on the selected search criteria. It can be value selection from a list, value selection from input date fields (using calendar), or free text input.
In order to affine your criteria, click on one of the selected criteria and inform the value you wish i.e. Click on For Decision, Discussion, Information, the list of those 3 items appears on the right list box, then select one of them and click on the ![]() button , the criterion’s value appears then in the criteria list.
button , the criterion’s value appears then in the criteria list.
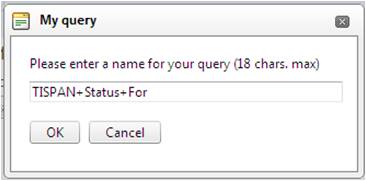
After having defined your filter criteria’s value click on “refresh” and the search query is submitted. In order to remove a criteria or/and a value from the Criteria list, click on the blue cross close to the criteria/value in the list. Should you wish to cancel all your pre defined criteria and values, click on "clear all" Should you click on the "New" button that allows you to define new search filter criteria then all values and all criteria are removed from the list box. To save your query and being able to retrieve your favourite ones each time you log in the portal click on button save as under the Criteria list, a pop up opens asking you the name of your query, fill in the name of your query and click OK:
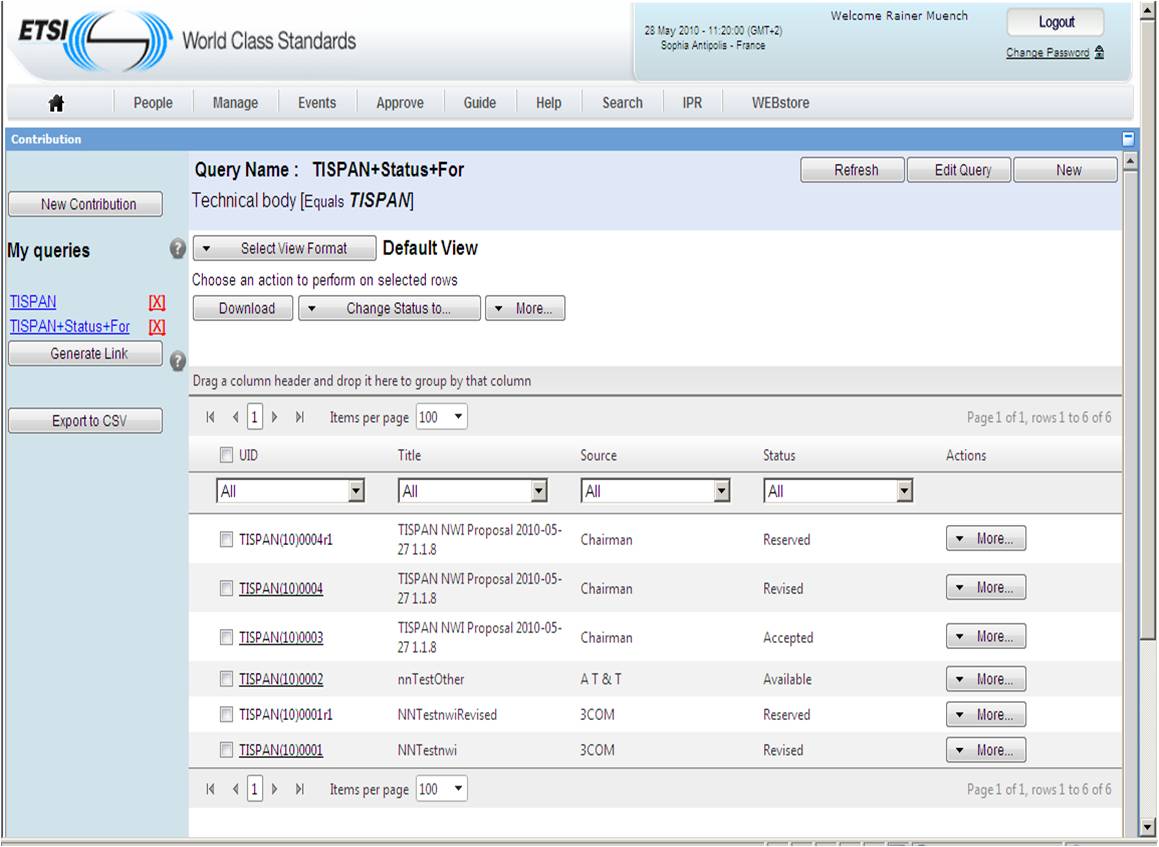
The custom query is saved and appears on the left part of the screen under "My queries".
Update a saved query:
To update a saved query, click on one of them under ‘’My query’’ and click on the button "edit query" on the top right of the screen. Your query is expanded and you can update some/all your filter criteria. Finish by clicking on "save", then the custom query is updated into the database.
Define your view format
Should you wish to perform a search without the need to save it, then repeat the actions below except the save part of your query and click on the button "Refresh". The result grid displays all records found in the database which match the query executed by the user.
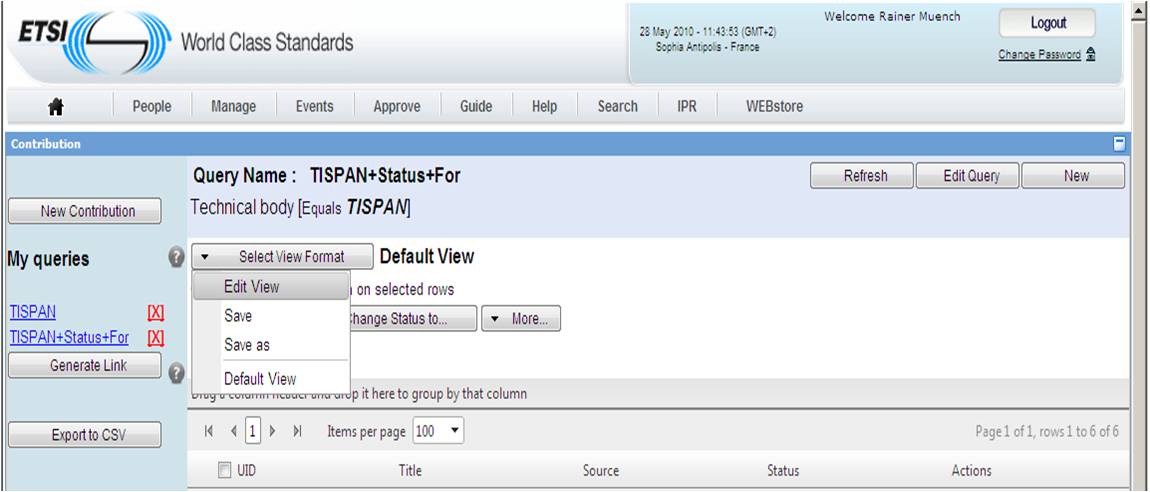
It is possible to select a predefined view format to display the result. A menu "Select view Format" is displayed at the top of the section, above the grid. It displays the list of actions available on view format, and it displays the list of available view formats (default view format, any number of custom view formats).
Note: A view format is a selection of columns of the result grid. It also contains data about the column order, sort, grouping, and width.
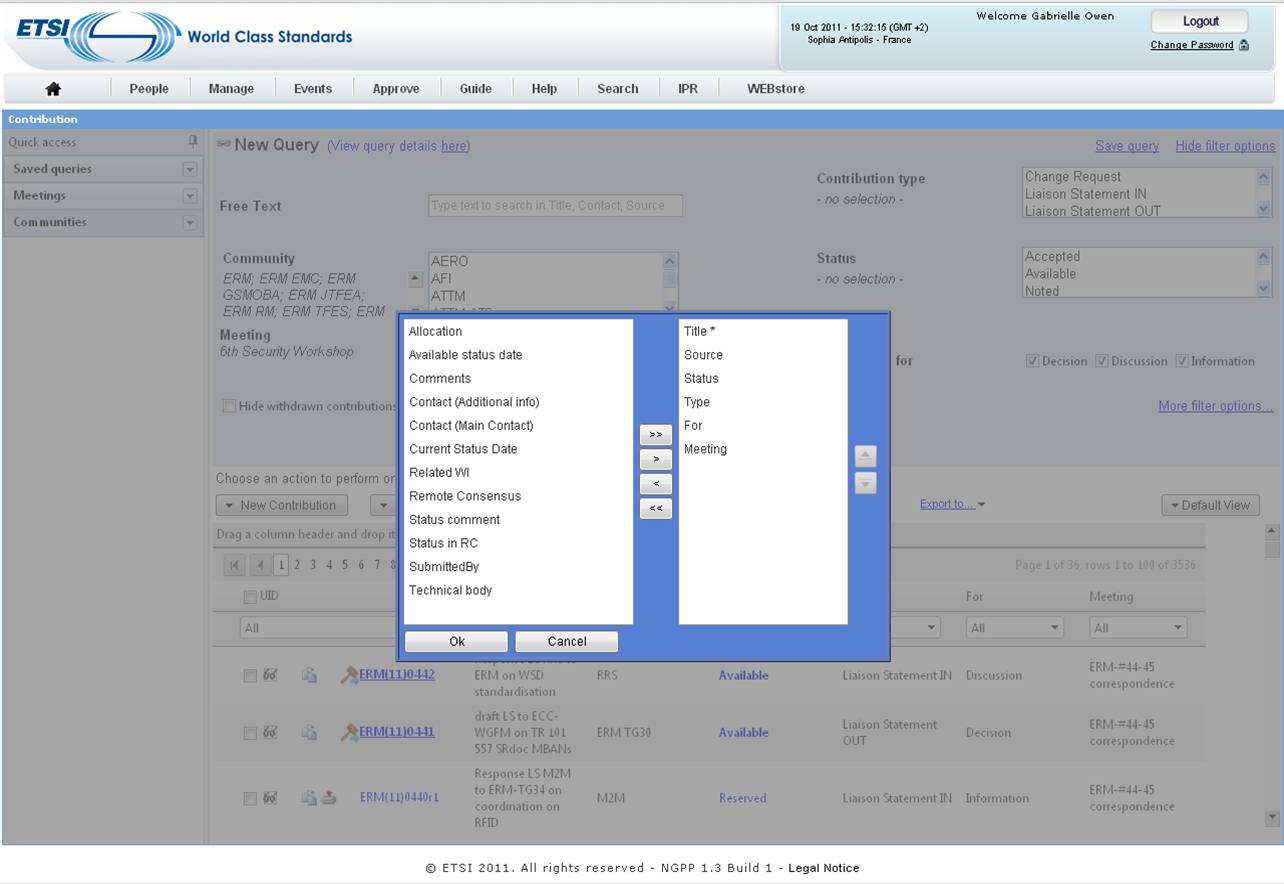
When selecting the item "Edit view Format" from the menu "select view format" as shown in print screen above, a pop-up opens which allow you to customise your prefered view by defining the columns you would like to see displayed in the result grid of contributions. You can also select the order of how the columns are displayed.
See below print screen:
Should you wish to display all available columns then use the that will move all the items from the left to the right columns. Should you wish to remove the selected items except "Contrib ID", "Title" and "Actions which are mandatory, then click on
![]()
Should you wish to select items one by one then select the wished item in the left part of the pop-up and use to move it to the right part. Should you wish to remove one item from the selected list then select this item and click on
![]()
To order your selected columns use the up and down button on the right of the pop-up screen.
CREATE A CONTRIBUTION
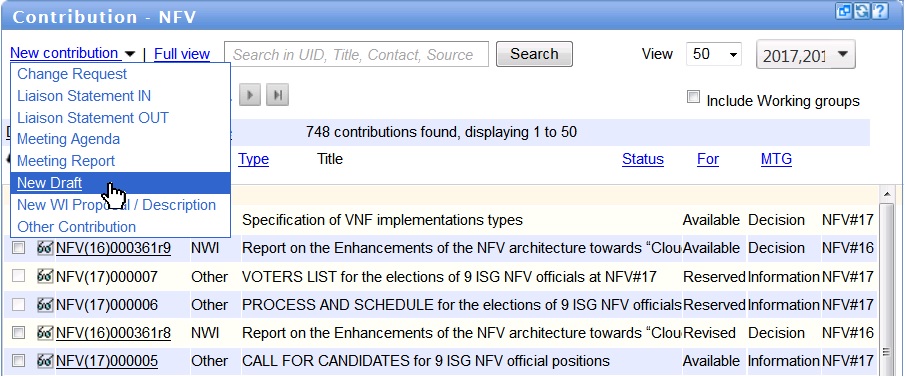
You can create a contribution from two destinations:
- From the Portal Contributions portlet by clicking on the "contribute" button
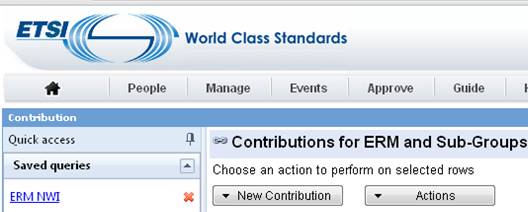
- From the Contribution application itself by clicking on "New contribution"
When you click on these buttons, a pop-up opens asking you to choose your contribution types.
Create a Meeting Agenda, Meeting Report, Change Request, Liaison Statement IN/OUT, Other contribution
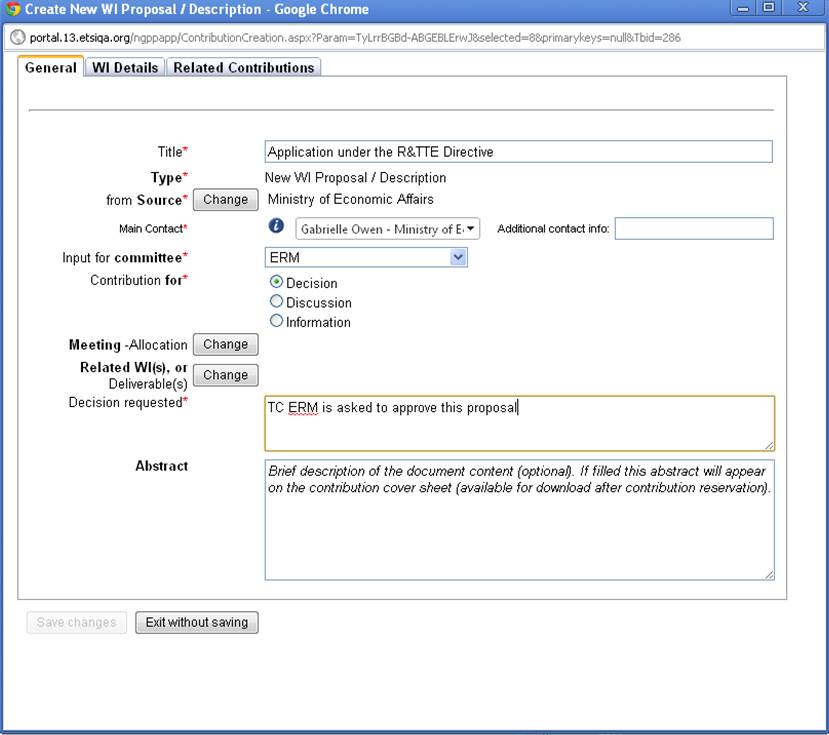
The system displays the contribution creation main screen on the general tab.
Here are the attributes needed to fill in, in order for the system to capture these information and retrieve them in the contribution document.
Note: All attributes from the general tab are mandatory except the contact and abstract fields.
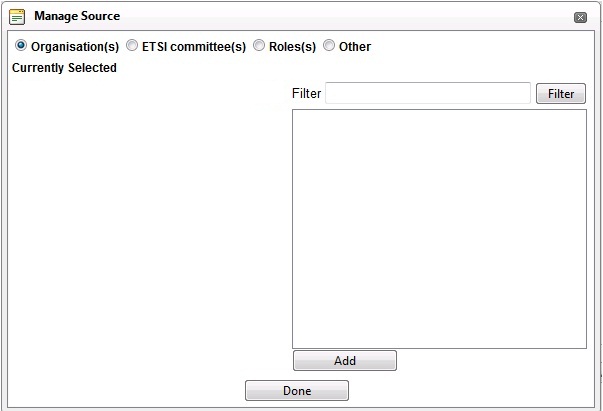
- The type of the contribution can be changes for this "family of contributions" - Title: Type text - Manage Source: When clickng on the button near the field "Source", a pop-up "Manage Source" opens.
There are 3 different types of Source:
     - Organisations
     - ETSI committees
     - Roles: Chairman, Vice-Chairman, Secretary, Rapporteur, WG/TG Chairman, ETSI support, Other
Note: all sources of a contribution must be from the same type.
You can add one or multiple sources from the same type.
- Contact: Type free text - For: You need to inform the system whether your contribution is for Decision, Discussion, Information - IF your contribution is for decision then you have to document it by filling in the "Decision/Action requested" -Abstract: Type text
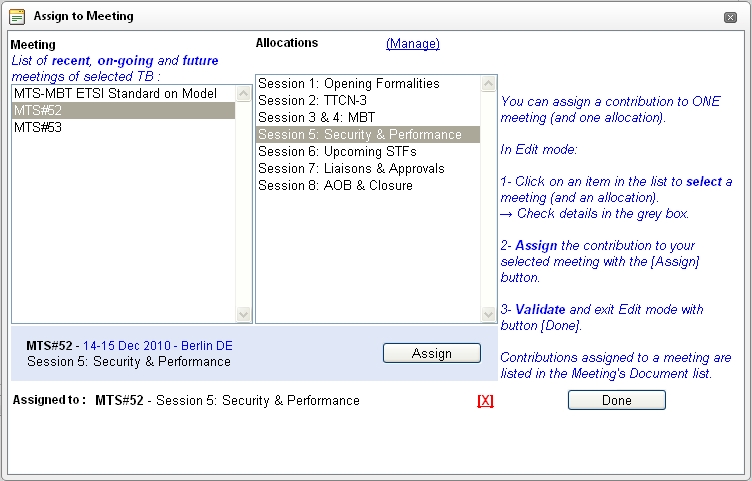
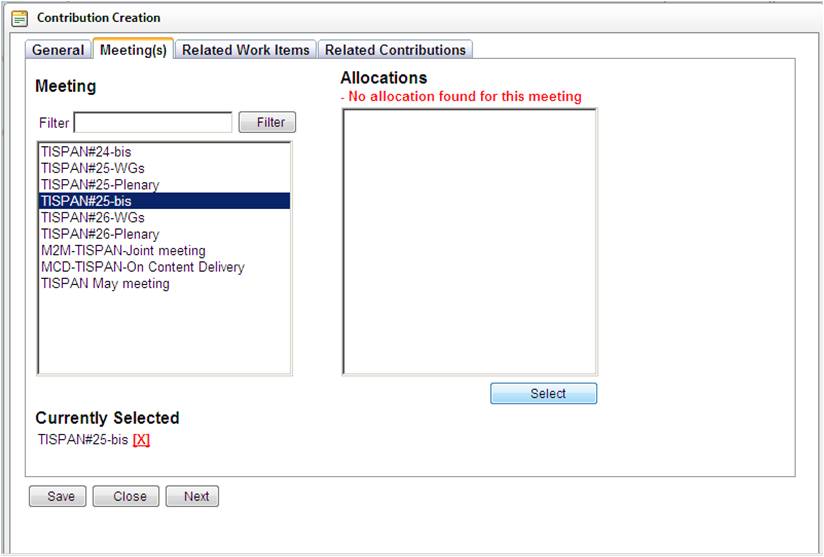
You have the possibility to attach your contribution to a meeting. To do so, from the genral tab you will need to click on the button "next" or to select the Tab "Meeting" from the top bar of the pop-up window.
The system retrieves the ongoing and future meeting of the committee, you can still use the text field that allows you to filter the content of the list box and/or to call other meetings from other committees as you can attach a contribution to any ETSI TB meetings.
There is also the possibility to attach your contribution to an allocation (if some exists). Those allocation could be for instance agenda items.
Select the meeting from the displayed list and an allocation and click on the select button.
The selected meeting and allocation are displayed at the bottom of the pop-up with a red cross in case you decide to remove this chosen meeting and select a new one:
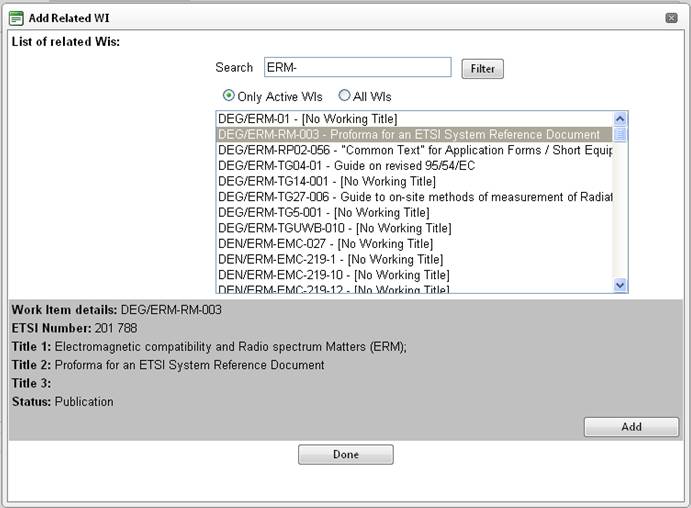
You can also attach your contribution to a related work item
The system displays all the work item attached to the committee you contribute for, the text field allow you to filter the content of the box or to search for other ETSI work items. It is possible to select more than one work item. Select one Work item in the displayed list and click the "Add" button, the selected work item appears on the left part of the pop-up with a red cross which allow you to remove it.
Attach your contribution to a related contribution
To do so, repeat the same actions as for "Add related Work Item"
Your contribution can now be Saved.
Note: The information in relation to Meetings, Related Work items and related contribution are not mandatory, the contribution can be saved as soon as you have indicated the attributes from the General Tab.
